
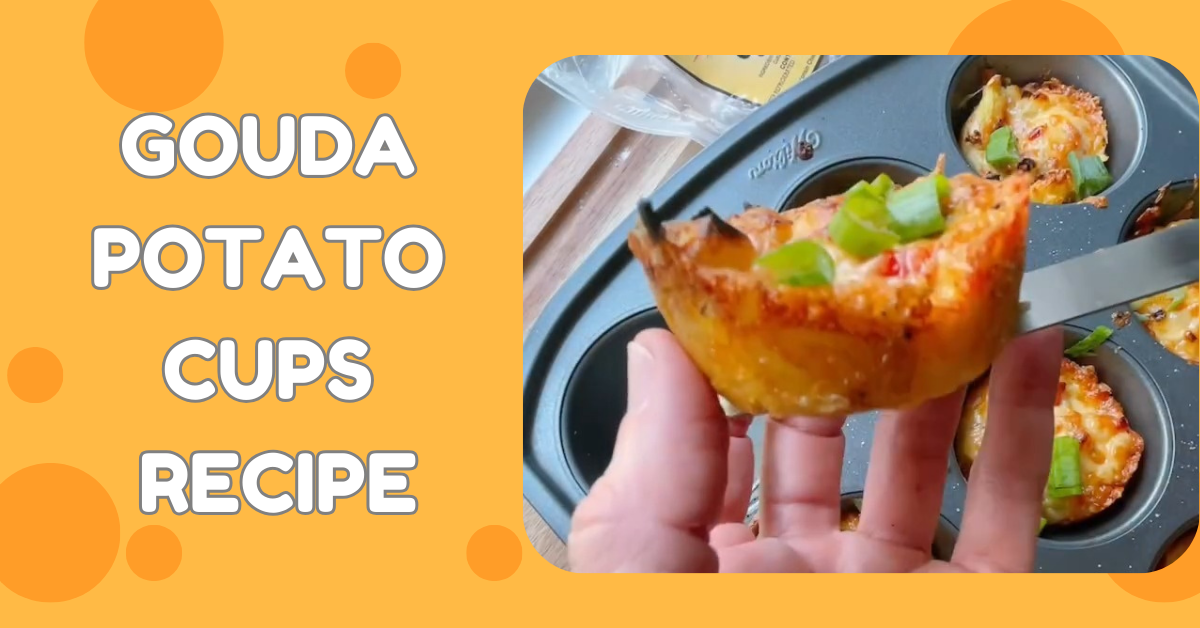
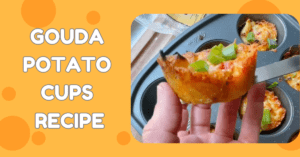
If you’re a fan of crispy potatoes, gooey cheese, and comfort food with a twist, you’re going to fall in love with Gouda Potato Cups. These golden, cheesy delights are the perfect combination of soft baby butter potatoes, savory garlic butter, and melty Gouda cheese. Baked to crispy perfection in a muffin tin, they’re great as appetizers, party snacks, or even a unique side dish.
This recipe brings together humble ingredients and elevates them with texture, flavor, and presentation. Whether you’re hosting a dinner party or just want something indulgent for a cozy night in, Gouda Potato Cups check all the boxes.
In this post, I’ll walk you through the full process, share a few tips, and explain why each step makes this dish as delicious as it is. By the end, you’ll be ready to serve up a batch that disappears in minutes.
Why Gouda?
Let’s talk cheese first. Gouda is a semi-hard cheese with a rich, buttery flavor and excellent meltability. When baked, it turns creamy, slightly smoky, and incredibly indulgent. It pairs beautifully with potatoes, which soak up that cheese and become the perfect base.
You can use young gouda for a mild flavor or opt for aged gouda if you’re after something a little sharper. Either way, it creates that irresistible cheesy pull when you lift one of these cups out of the tin.
The Ingredients You’ll Need
Here’s everything you’ll need to bring these Gouda Potato Cups to life:
Baby butter potatoes – These are small, tender, and buttery by nature. They’re easy to press into muffin tins and have a creamy texture when cooked.
Butter mixture – A simple combination of melted butter, minced garlic, chopped parsley, salt, and black pepper. This blend adds flavor and helps crisp up the edges.
Shredded Gouda cheese – Pre-shredded or freshly grated; the key is to use a generous amount.
Finishing herbs – Fresh parsley or thinly sliced green onions to brighten up the final dish.
Step-by-Step Instructions
Step 1: Boil the Potatoes
Start by boiling your baby butter potatoes until they’re fork-tender. This usually takes around 10 to 15 minutes depending on the size of the potatoes. You want them soft enough to mash but not falling apart.
Pro tip: Don’t overboil. If they’re too soft, they’ll fall apart when you try to press them into the muffin tin.
Step 2: Prepare Your Muffin Tin
While the potatoes are boiling, preheat your oven to 380°F (193°C). Lightly spray a 6- or 8-cup muffin tin with oil. This prevents sticking and helps the potato cups crisp up around the edges.
A non-stick muffin tin works best, but even a standard one will do the trick as long as it’s greased well.
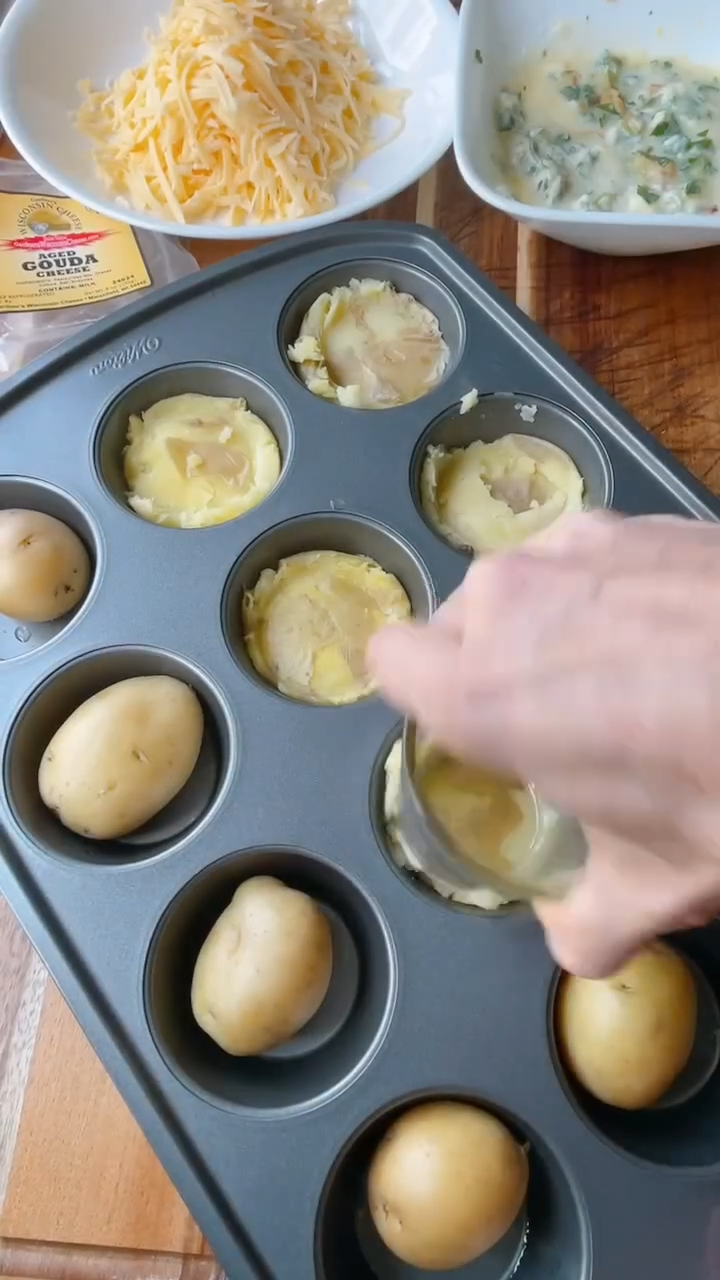
Step 3: Press the Potatoes
Once the potatoes are soft, transfer them to the muffin tin—one potato per cup. Using the bottom of a small coffee cup or glass, gently press each potato down to fill the bottom of the cup. This flattens them into the perfect little potato nest that will hold all the flavor and cheese.
If your potatoes are extra large, you can cut them in half before pressing.
Step 4: Brush with Butter Mixture
Now for the flavor bomb. Mix your melted butter with minced garlic, parsley, salt, and pepper. Using a brush or spoon, coat each pressed potato generously. Be sure to get the butter around the edges too—this is what gives the potato cups their golden, crispy exterior.
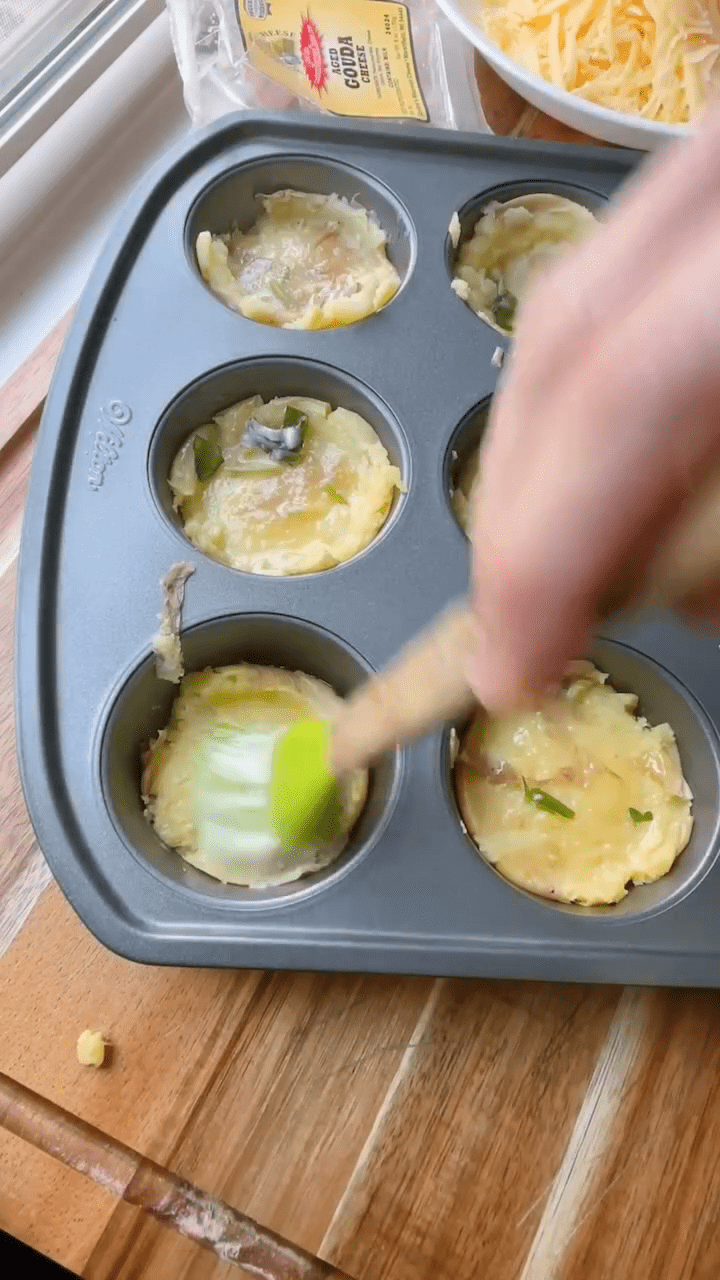
Slide the muffin tin into the oven and bake for about 20 minutes, or until the edges are deeply golden and crispy. The butter will sizzle and soak into the potatoes while the garlic infuses everything with that mouthwatering aroma.
Step 5: Add Cheese and Bake Again
Once the potatoes are golden and crisped, pull them out of the oven and top each cup with a generous handful of shredded Gouda cheese. Return the muffin tin to the oven and bake for an additional 10 to 15 minutes, or until the cheese is melted and bubbly.
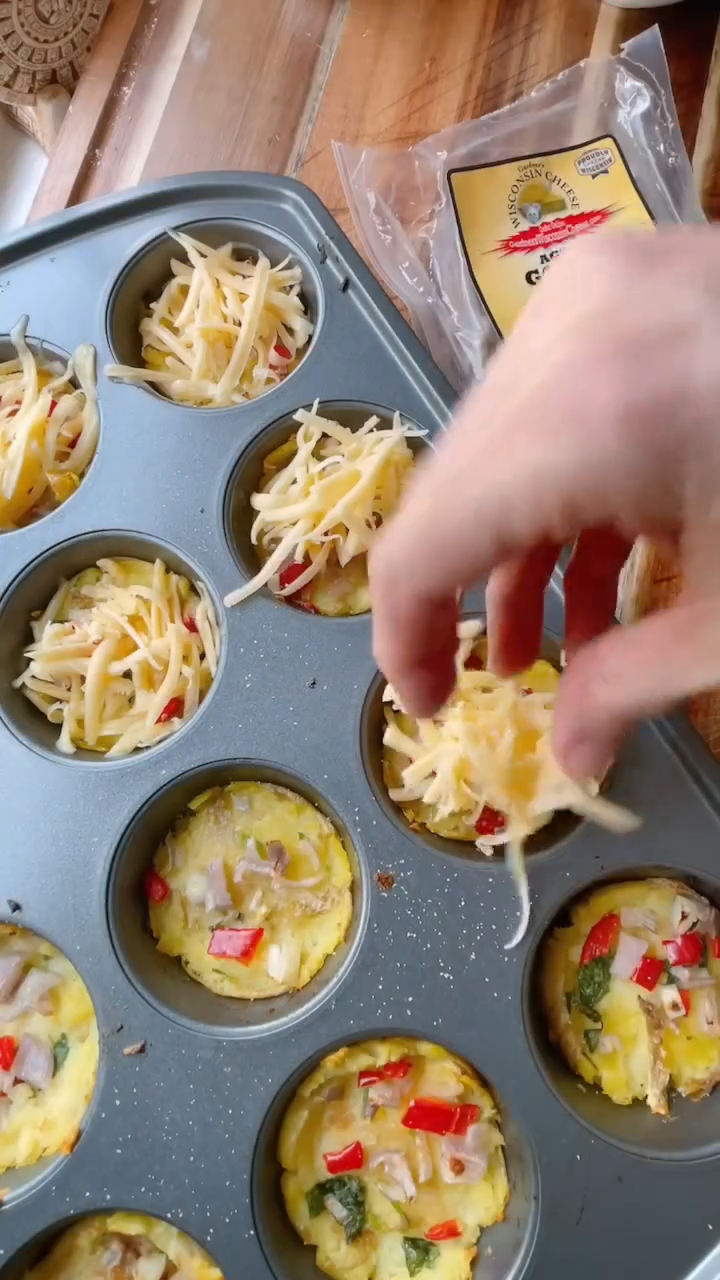
The cheese should form a gooey, golden cap over each potato base. If you want some crispy cheese edges, you can broil for the last minute or two—just keep a close eye to prevent burning.

Step 6: Garnish and Serve
Once out of the oven, let the potato cups cool for a couple of minutes. They’ll firm up slightly, making them easier to remove from the tin. Use a spoon or butter knife to gently lift them out.
Top with chopped parsley or green onions for a fresh finish. The pop of green not only adds color but also cuts through the richness of the butter and cheese.
Serving Suggestions
Gouda Potato Cups are versatile and can be served in a variety of ways:
Appetizers: Serve on a platter with toothpicks or small forks at your next gathering.
Side Dish: Pair with steak, grilled chicken, or a fresh salad.
Brunch Addition: Add to a breakfast or brunch spread alongside eggs and roasted vegetables.
Game Day Snack: These cups are a guaranteed crowd-pleaser during sports nights or casual hangouts.
If you’re feeling adventurous, you can even customize the filling. Think of adding crumbled bacon, sautéed mushrooms, or caramelized onions under the cheese for extra layers of flavor.
Make-Ahead and Storage
One of the best things about this recipe is that it can be made in advance. Simply prepare and bake the potato cups through the first round (before adding the cheese). Store them in the fridge, and when you’re ready to serve, top with cheese and reheat in the oven until warm and gooey.
Leftovers can be refrigerated for up to 3 days. Reheat in the oven or air fryer to restore their crispiness.
Final Thoughts
Gouda Potato Cups are proof that simple ingredients, when treated with a little creativity, can become something extraordinary. They’re crispy, cheesy, garlicky, and downright addictive. Whether you’re making them for a crowd or just to treat yourself, they’re bound to become a new favorite.
Next time you’re staring at a bag of potatoes and wondering what to make, give this recipe a try. One bite in, and you’ll be glad you did.
Must try Creamy Pesto Chicken and Broccoli Pasta Bake Recipe
Gouda Potato Cups Recipe
Try these delicious Gouda Potato Cups, a perfect blend of crispy potatoes, garlic butter, and melted Gouda cheese. A savory bite everyone will love!
Type: Appetizer, Side Dish
Cuisine: American
Keywords: Gouda Potato Cups, cheesy potato recipe, baked potatoes, garlic butter potatoes, party appetizers, comfort food
Recipe Yield: 6-8 servings (depending on muffin tin size)
Calories: Approx. 250-300 calories per serving (estimate based on standard serving size)
Preparation Time: 10 minutes
Cooking Time: 40 minutes
Total Time: 50 minutes
Recipe Ingredients:
- 10-12 baby butter potatoes
- 4 tbsp melted butter
- 2 cloves garlic, minced
- 2 tbsp fresh parsley, chopped
- Salt, to taste
- Black pepper, to taste
- 1 ½ cups shredded Gouda cheese
- Fresh parsley or green onions for garnish
Recipe Instructions:
Step 1: Boil the Potatoes:
- Start by boiling your baby butter potatoes until they're fork-tender. This usually takes around 10 to 15 minutes depending on the size of the potatoes. You want them soft enough to mash but not falling apart. Pro tip: Don’t overboil. If they’re too soft, they’ll fall apart when you try to press them into the muffin tin.
Step 2: Prepare Your Muffin Tin:
- While the potatoes are boiling, preheat your oven to 380°F (193°C). Lightly spray a 6- or 8-cup muffin tin with oil. This prevents sticking and helps the potato cups crisp up around the edges. A non-stick muffin tin works best, but even a standard one will do the trick as long as it’s greased well.
Step 3: Press the Potatoes:
- Once the potatoes are soft, transfer them to the muffin tin—one potato per cup. Using the bottom of a small coffee cup or glass, gently press each potato down to fill the bottom of the cup. This flattens them into the perfect little potato nest that will hold all the flavor and cheese. If your potatoes are extra large, you can cut them in half before pressing.
Step 4: Brush with Butter Mixture:
- Now for the flavor bomb. Mix your melted butter with minced garlic, parsley, salt, and pepper. Using a brush or spoon, coat each pressed potato generously. Be sure to get the butter around the edges too—this is what gives the potato cups their golden, crispy exterior. Slide the muffin tin into the oven and bake for about 20 minutes, or until the edges are deeply golden and crispy. The butter will sizzle and soak into the potatoes while the garlic infuses everything with that mouthwatering aroma.
Step 5: Add Cheese and Bake Again:
- Once the potatoes are golden and crisped, pull them out of the oven and top each cup with a generous handful of shredded Gouda cheese. Return the muffin tin to the oven and bake for an additional 10 to 15 minutes, or until the cheese is melted and bubbly. The cheese should form a gooey, golden cap over each potato base. If you want some crispy cheese edges, you can broil for the last minute or two—just keep a close eye to prevent burning.
Step 6: Garnish and Serve:
- Once out of the oven, let the potato cups cool for a couple of minutes. They’ll firm up slightly, making them easier to remove from the tin. Use a spoon or butter knife to gently lift them out. Top with chopped parsley or green onions for a fresh finish. The pop of green not only adds color but also cuts through the richness of the butter and cheese.