

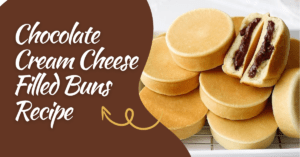
There’s something magical about freshly baked buns—especially when they’re stuffed with a rich, creamy chocolate cream cheese filling. This recipe brings together the soft, pillowy texture of homemade bread with the luscious, melt-in-your-mouth richness of dark chocolate and cream cheese. Whether you’re baking to impress guests or simply treating yourself, these Chocolate Cream Cheese Filled Buns are sure to become a favorite in your kitchen.

In this blog post, we’ll walk you through the full process of making these heavenly buns. From the simple dough to the irresistible filling, and even tips for perfect results every time, you’ll get everything you need to bake with confidence.
Why You’ll Love These Chocolate Cream Cheese Filled Buns
The contrast between the fluffy bread and the rich filling makes these buns a standout treat. The bread is mildly sweet, with a tender crumb that’s perfect for hugging the creamy center. Meanwhile, the filling is an indulgent blend of dark chocolate and cream cheese, slightly sweetened and flavored with a touch of vanilla. Every bite is an experience in texture and taste.
These buns also make a great addition to brunch spreads, tea time treats, or an evening dessert when warmed slightly and served with a glass of milk or cup of coffee.
Ingredients Breakdown
Let’s explore the key components of this recipe so you know why each element matters.
For the Dough:
Bread Flour or All-Purpose Flour (180g): Bread flour will give your buns a slightly chewier texture due to its higher protein content, but all-purpose flour works just fine for a softer, lighter bun.
Instant Dry Yeast (3g): This is the leavening agent that helps your dough rise and gives the buns their fluffy structure.
Salt (1/4 tsp): Balances the sweetness and strengthens the gluten structure.
Sugar (30g): Adds a touch of sweetness to the dough and helps feed the yeast for better rise.
Condensed Milk (45g): Adds richness and sweetness while enhancing the soft texture of the dough.
Milk (85g): Use any milk you prefer. Full-fat dairy milk gives the richest results.
Butter (25g): Softened and added after the dough comes together, it adds moisture and creates a tender crumb.
For the Filling:
Cream Cheese (100g): Use full-fat cream cheese for the creamiest filling.
Dark Chocolate (100g): Melted to create a rich, slightly bitter contrast to the sweet bun.
Sugar (20g): Lightly sweetens the filling.
Vanilla Extract (1/2 tsp): Adds warmth and depth of flavor.
Salt (pinch): Enhances the chocolate flavor and balances the sweetness.
Step-by-Step Instructions
1. Make the Dough
Start by combining all the dry ingredients—flour, yeast, salt, and sugar—in a large bowl. Add in the condensed milk and regular milk. Stir everything together until the dough forms a rough ball. Let it rest for 20 minutes, which allows the flour to hydrate and the gluten to begin forming naturally, making kneading easier.
Next, add the room temperature butter. Knead the dough by hand or with a mixer until it becomes smooth and elastic—this usually takes about 10 to 12 minutes. You’ll know it’s ready when it no longer sticks to your hands and you can stretch it without tearing easily.
Shape the dough into a ball, cover it, and let it rest for a few minutes before dividing it into portions.
2. Portion and Rest
Divide the dough into equal portions, around 70g each. Roll each portion into a smooth ball. Let them rest for about 15 minutes. This resting period relaxes the gluten, making it easier to flatten the dough for filling later.

3. Prepare the Filling
While the dough is resting, prepare the chocolate cream cheese filling. In a bowl, whisk together softened cream cheese, melted dark chocolate, sugar, vanilla extract, and a pinch of salt. The filling should be smooth and creamy—easy to pipe or spoon into the dough later.
You can place the filling into a piping bag for easier portioning.
4. Fill and Shape the Buns
Take each dough ball and gently flatten it into a circle. Pipe or spoon a generous amount of the filling into the center. Gather the edges of the dough and pinch them together to seal the bun. It’s important to ensure the bottom is sealed tightly to prevent the filling from leaking during baking.
Once all buns are filled and sealed, place them in a greased or parchment-lined baking mold, spacing them evenly apart.
 |  |  |
5. Final Proofing
Let the shaped buns proof for about 30 minutes in a warm area. They should puff up slightly but not double in size. Preheat your oven to 180°C during this time.

6. Bake and Enjoy
Bake the buns for 15 to 18 minutes, or until the tops are lightly golden. The baking time may vary slightly depending on your oven, so keep an eye on them during the final minutes.

Let the buns cool slightly before serving. The filling will be warm and melty, making every bite a delicious treat.
Tips for Perfect Chocolate Cream Cheese Buns
Temperature Matters: Make sure all ingredients are at room temperature. Cold ingredients can affect yeast activity and how well the dough comes together.
Don’t Overfill: It’s tempting to add lots of filling, but too much can lead to leaks during baking. Stick to about 1 to 1.5 tablespoons per bun.
Sealing is Key: Take time to seal the dough properly. If the bottom isn’t tightly closed, the filling can ooze out.
Test Doneness: Tap the bottom of a baked bun—it should sound hollow when it’s done. You can also gently press the top; it should spring back.
Serve Fresh: These buns taste best when fresh and slightly warm. You can reheat them in the microwave for about 10 seconds before eating.
Variations and Add-Ons
Nutty Crunch: Add crushed hazelnuts or almonds to the filling for added texture.
Cocoa Dough: For a chocolate overload, add a tablespoon of cocoa powder to the dough.
Fruit Twist: Add a spoonful of raspberry jam along with the chocolate filling for a fruity surprise.
Storage Instructions
Store any leftover buns in an airtight container at room temperature for up to 2 days. For longer storage, refrigerate them for up to 5 days. Reheat in the microwave or oven before serving.
You can also freeze the unbaked, filled buns. Let them thaw and proof before baking as instructed.
Final Thoughts
These Chocolate Cream Cheese Filled Buns are more than just a dessert—they’re a warm, comforting treat that showcases the beauty of homemade baking. With simple ingredients and a little love, you can create a bakery-style experience right at home.
Whether you’re making them for a weekend brunch, a sweet snack, or to share with loved ones, these buns are guaranteed to impress. Try them once, and they might just become a staple in your baking rotation.
Must try Chocolate and Matcha Ice Cream Sandwiches Recipe
Chocolate Cream Cheese Filled Buns Recipe
Chocolate Cream Cheese Filled Buns that are soft, fluffy and loaded with rich filling. Perfect homemade treat for dessert, brunch, or anytime craving.
Type: Dessert / Snack
Cuisine: Fusion (Western-inspired with a touch of Asian-style milk bread)
Keywords: Chocolate Cream Cheese Filled Buns, cream cheese buns, chocolate buns, filled buns, soft bread buns, homemade buns
Recipe Yield: 6 buns
Calories: Approximately 280–320 kcal per bun (may vary based on ingredients used)
Preparation Time: 45 minutes
Cooking Time: 18 minutes
Total Time: 1 hour 3 minutes
Recipe Ingredients:
- 180g bread flour or all-purpose flour
- 3g instant dry yeast
- 1/4 tsp salt
- 30g sugar
- 45g condensed milk
- 85g milk of choice
- 25g room temperature butter
- 100g room temperature cream cheese
- 100g melted dark chocolate
- 20g sugar
- 1/2 tsp pure vanilla extract
- Pinch of salt
Recipe Instructions:
1. Make the Dough:
- Start by combining all the dry ingredients—flour, yeast, salt, and sugar—in a large bowl. Add in the condensed milk and regular milk. Stir everything together until the dough forms a rough ball. Let it rest for 20 minutes, which allows the flour to hydrate and the gluten to begin forming naturally, making kneading easier. Next, add the room temperature butter. Knead the dough by hand or with a mixer until it becomes smooth and elastic—this usually takes about 10 to 12 minutes. You’ll know it’s ready when it no longer sticks to your hands and you can stretch it without tearing easily. Shape the dough into a ball, cover it, and let it rest for a few minutes before dividing it into portions.
2. Portion and Rest:
- Divide the dough into equal portions, around 70g each. Roll each portion into a smooth ball. Let them rest for about 15 minutes. This resting period relaxes the gluten, making it easier to flatten the dough for filling later.
3. Prepare the Filling:
- While the dough is resting, prepare the chocolate cream cheese filling. In a bowl, whisk together softened cream cheese, melted dark chocolate, sugar, vanilla extract, and a pinch of salt. The filling should be smooth and creamy—easy to pipe or spoon into the dough later. You can place the filling into a piping bag for easier portioning.
4. Fill and Shape the Buns:
- Take each dough ball and gently flatten it into a circle. Pipe or spoon a generous amount of the filling into the center. Gather the edges of the dough and pinch them together to seal the bun. It’s important to ensure the bottom is sealed tightly to prevent the filling from leaking during baking. Once all buns are filled and sealed, place them in a greased or parchment-lined baking mold, spacing them evenly apart.
5. Final Proofing:
- Let the shaped buns proof for about 30 minutes in a warm area. They should puff up slightly but not double in size. Preheat your oven to 180°C during this time.
6. Bake and Enjoy:
- Bake the buns for 15 to 18 minutes, or until the tops are lightly golden. The baking time may vary slightly depending on your oven, so keep an eye on them during the final minutes. Let the buns cool slightly before serving. The filling will be warm and melty, making every bite a delicious treat.