

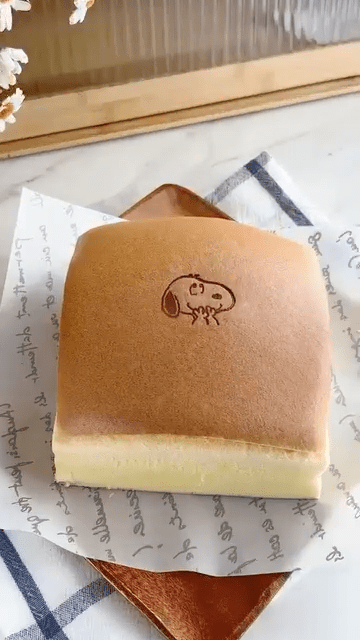
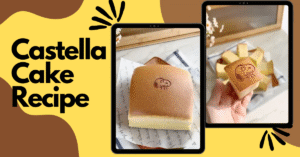
If you’re a fan of soft, moist, and incredibly fluffy sponge cakes, you’re in for a treat. The Castella cake—also known as Japanese Kasutera—is a light, jiggly cake made from simple ingredients but requiring the perfect technique to master. Its pillowy texture, subtle sweetness, and golden-brown top make it an all-time favorite for cake lovers and baking enthusiasts.
In this blog, we’ll walk through an authentic and foolproof Castella cake recipe, including expert tips to get that perfect soft bounce. So preheat your oven and let’s get started on your next baking adventure!
What Makes Castella Cake So Special?
Before we dive into the recipe, let’s talk about why the Castella cake has such a fan following. Originally from Portugal and introduced to Japan in the 16th century, this cake has become a staple in Japanese bakeries. What sets it apart is its soft, bouncy texture and moist crumb, achieved without any baking powder or butter. The fluffiness is all thanks to properly whipped egg whites and a gentle baking process using a water bath.
Ingredients You’ll Need
Here’s everything you’ll need for a perfect 6-inch square Castella cake:
5 egg yolks
80g milk
40g oil
80g low-protein flour (cake flour), sifted
5 egg whites
70g sugar
6g lemon juice
Pan size: 15×15 cm (6” square pan)
Now let’s break this down into easy-to-follow steps to make your Castella cake flawless.
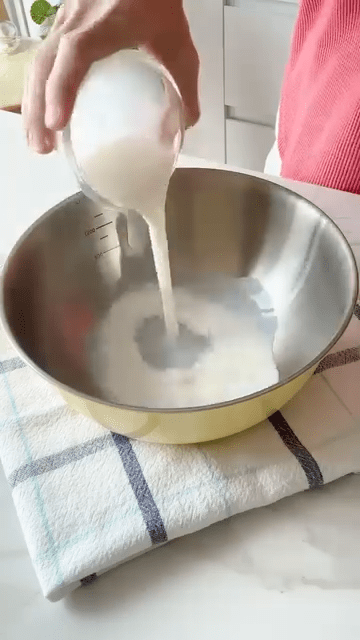
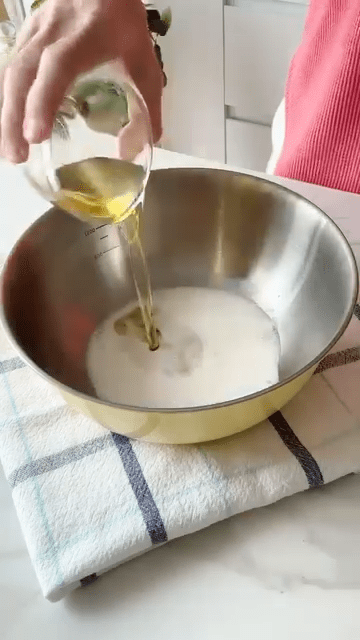
Step 1: Prepare the Oil-Milk Mixture
Start by mixing 40g of oil and 80g of milk in a bowl. Stir this mixture well until it turns smooth and you no longer see any oil streaks. This combination of oil and milk helps the cake stay moist and light at the same time.
Pro tip: Warm the milk slightly (not hot) before mixing—it blends more easily with oil and helps with emulsification.
 |  |  |
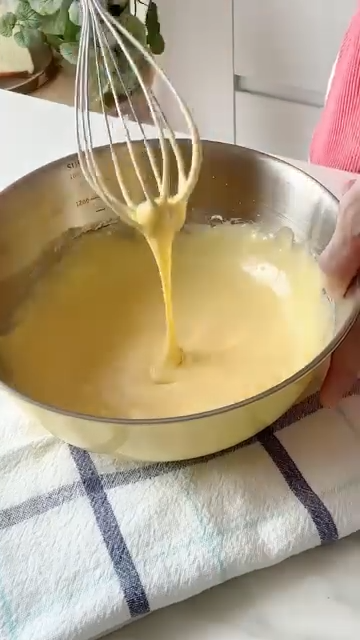
Step 2: Incorporate the Sifted Flour
Next, add the 80g of sifted cake flour to your oil-milk mixture. Stir until everything is smooth and well combined. Cake flour is essential here—its lower protein content ensures a softer texture compared to all-purpose flour.
Why sift? Sifting the flour helps eliminate lumps and introduces air, which contributes to the cake’s airy structure.
 |  |
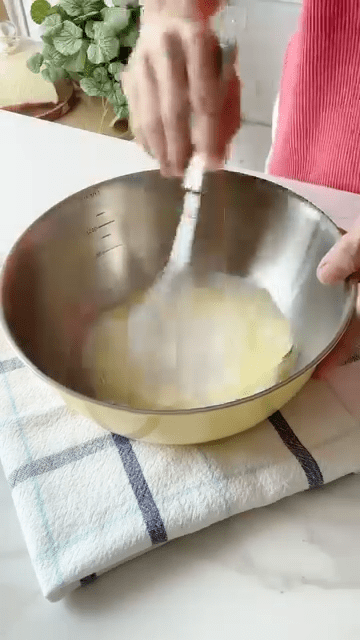
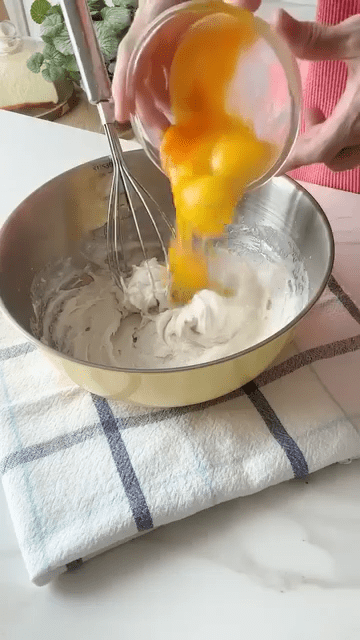
Step 3: Add the Egg Yolks
Now add 5 egg yolks into your batter and mix thoroughly. The batter should now be smooth and slightly thick. Egg yolks add richness and help bind the ingredients.
Make sure you stir gently but thoroughly—lumps are your enemy here!
 |  |
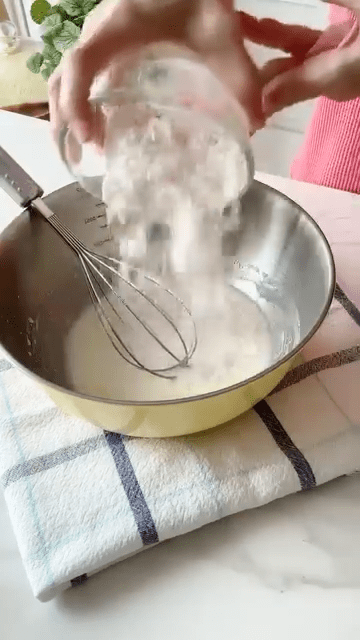
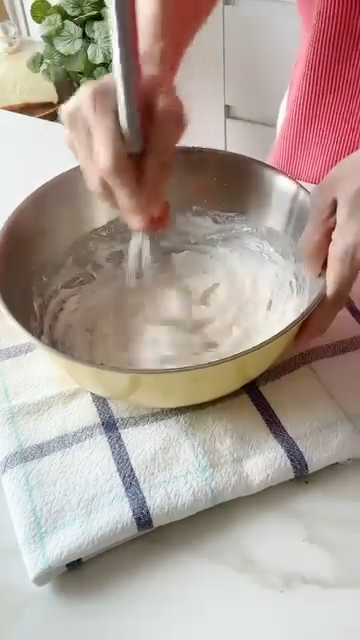
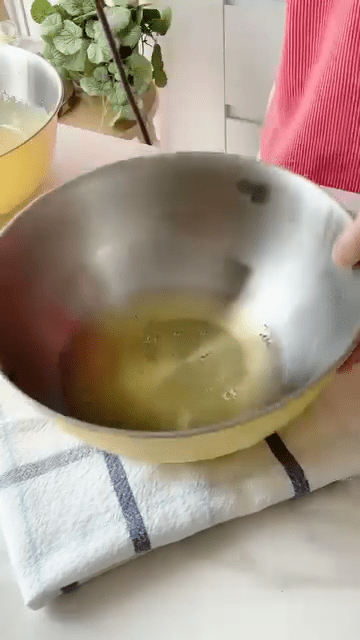
Step 4: Whipping the Perfect Meringue
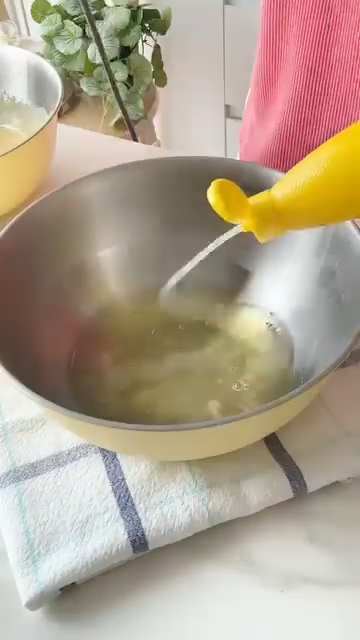
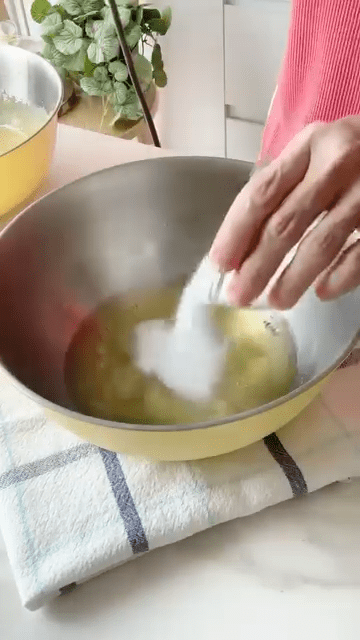
This step is crucial to the overall success of your Castella cake. In a clean, grease-free bowl, beat 5 egg whites on high speed. Add 6g of lemon juice as soon as you start beating—this helps stabilize the meringue.
When big bubbles form, add the first third of the 70g sugar.
As the bubbles become finer, add the second third of the sugar.
When you see fine lines forming as you beat the mixture, add the remaining sugar.
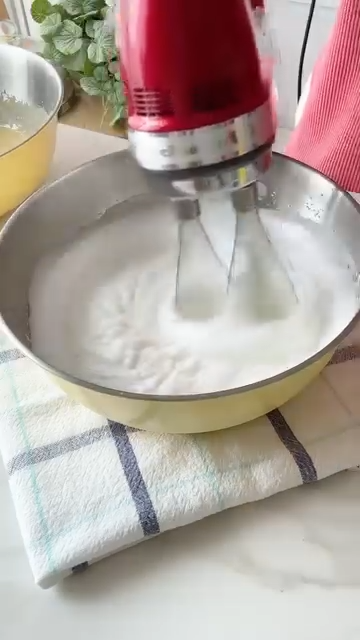
Continue beating until you achieve a firm/medium peak meringue. The peaks should hold their shape but still have a slight curl at the tip. This texture ensures your cake rises beautifully without cracking.
 |  |  |  |
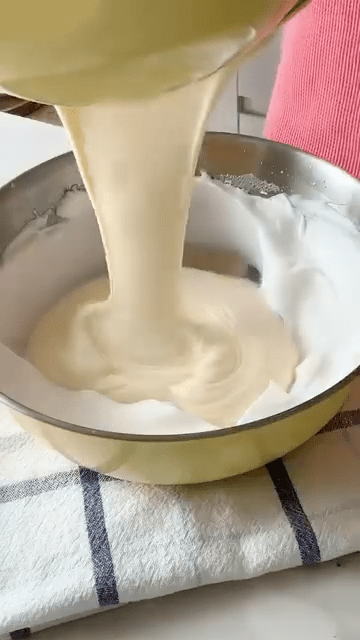
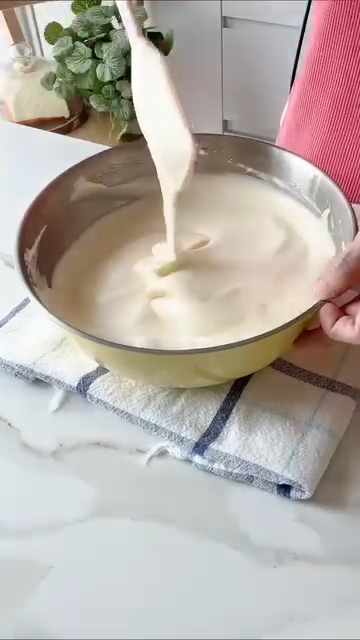
Step 5: Folding the Meringue
Take 1/3 of the meringue and gently fold it into your yolk batter using a spatula. This first mix helps lighten the yolk mixture and makes folding the rest easier.
Then pour the yolk batter back into the bowl with the remaining meringue. Fold gently but thoroughly, turning the bowl as you mix. The goal is to combine without deflating the meringue.
Important: Don’t rush this step. Overmixing will deflate the batter and under-mixing will leave streaks.
 |  |
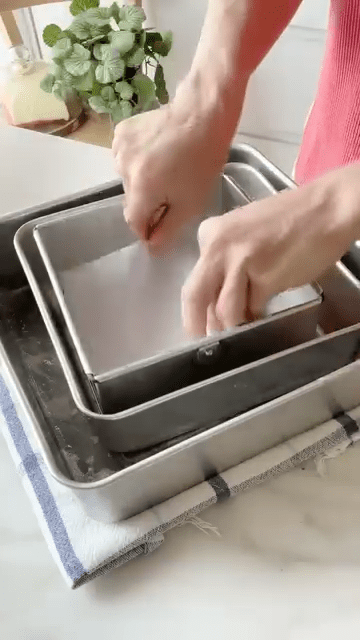
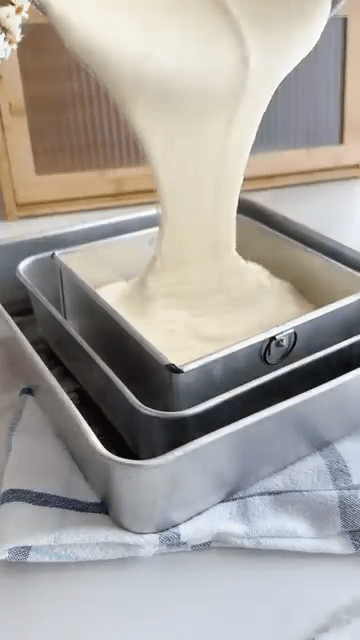
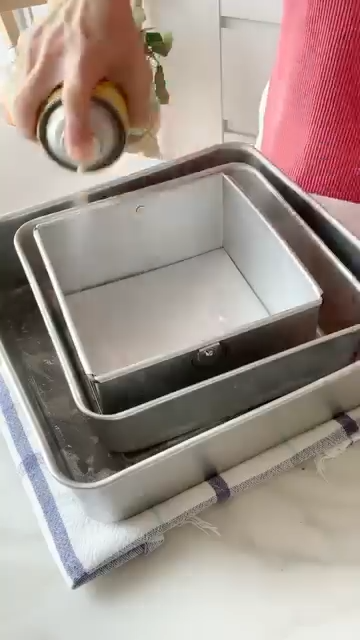
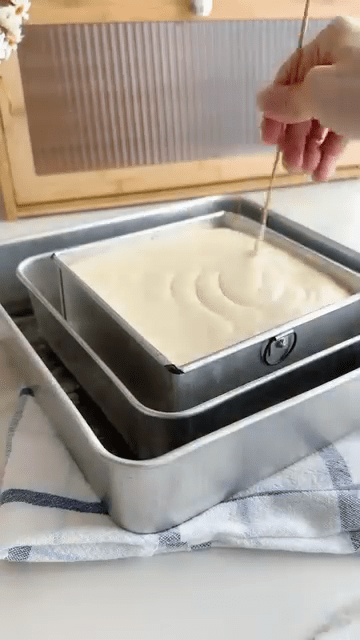
Step 6: Pour and Prep the Pan
Line the bottom of your 6-inch square pan with parchment paper and lightly grease the sides. Pour the final batter gently into the pan. Give it a light tap to release large air bubbles trapped inside.
 |  |  |  |
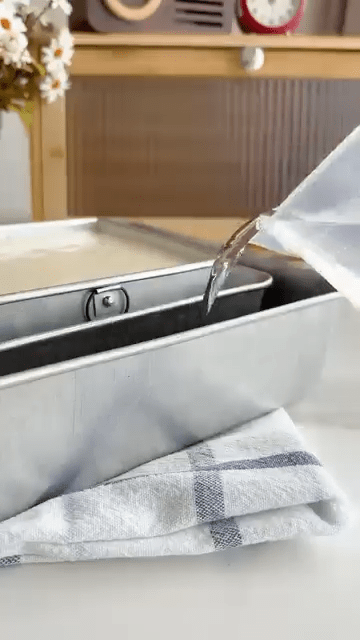
Step 7: Bake Using Water Bath Method
Place your cake pan into a larger tray filled with hot water—this is called the bain-marie or water bath method. It allows the cake to bake gently and evenly, preventing cracks on top.
Bake at 150°C (302°F) for 1 hour 15 minutes to 1 hour 30 minutes. Avoid opening the oven during the first hour as it may cause the cake to collapse.
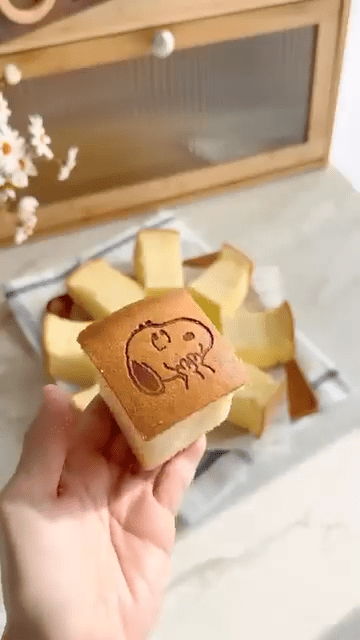
You’ll know the cake is ready when the top is a rich golden brown and a skewer inserted in the center comes out clean.
Step 8: Demould and Cool
Once out of the oven, remove the cake from the pan immediately to prevent condensation from forming and making the bottom soggy. Let it cool on a wire rack. For the cleanest edges, you can trim the sides once the cake is fully cooled.
Tips for the Perfect Castella Cake
Use room-temperature eggs. They whip better and provide more volume.
Don’t overbeat the meringue. Stiff peaks can make folding difficult.
Patience is key. Folding and baking take time, but rushing can ruin the delicate structure.
Water level matters. Make sure the water bath doesn’t dry out during baking. Add more hot water if needed.
Serving and Storing
Castella cake is best served slightly warm or at room temperature. You can wrap it and refrigerate for a firmer texture or microwave it for a few seconds if you like it softer.
It also stores well for 2–3 days in an airtight container. In fact, many say the flavor deepens after a day!
Final Thoughts
This Castella cake recipe proves that with a few simple ingredients and the right technique, you can make bakery-quality sponge cake right at home. Whether you’re baking for a celebration, a family dessert, or just because you crave a fluffy slice of joy, this cake is guaranteed to impress.
So go ahead, gather your tools, and bake your first Castella cake! Once you taste that melt-in-your-mouth softness, you’ll want to make it again and again.
Must Try Biscoff Banana Bread Recipe
Castella Cake Recipe
Learn how to make soft, fluffy Castella cake with this easy recipe. Follow step-by-step instructions for a perfect jiggly sponge every time!
Type: Dessert / Sponge Cake
Cuisine: Japanese
Keywords: Castella cake recipe, Japanese sponge cake, fluffy Castella, soft Castella cake, Castella cake step-by-step
Recipe Yield: 1 cake (6” square, approx. 4–6 servings)
Calories: Approximately 160–180 kcal per serving
Preparation Time: 25 minutes
Cooking Time: 1 hour 20 minutes
Total Time: 1 hour 45 minutes
Recipe Ingredients:
- 5 egg yolks
- 80g milk
- 40g oil
- 80g low-protein flour (cake flour), sifted
- 5 egg whites
- 70g sugar
- 6g lemon juice
Recipe Instructions:
Prepare the Oil-Milk Mixture:
- Start by mixing 40g of oil and 80g of milk in a bowl. Stir this mixture well until it turns smooth and you no longer see any oil streaks. This combination of oil and milk helps the cake stay moist and light at the same time. Pro tip: Warm the milk slightly (not hot) before mixing—it blends more easily with oil and helps with emulsification.
Incorporate the Sifted Flour:
- Next, add the 80g of sifted cake flour to your oil-milk mixture. Stir until everything is smooth and well combined. Cake flour is essential here—its lower protein content ensures a softer texture compared to all-purpose flour. Why sift? Sifting the flour helps eliminate lumps and introduces air, which contributes to the cake's airy structure.
Add the Egg Yolks:
- Now add 5 egg yolks into your batter and mix thoroughly. The batter should now be smooth and slightly thick. Egg yolks add richness and help bind the ingredients. Make sure you stir gently but thoroughly—lumps are your enemy here!
Whipping the Perfect Meringue:
- This step is crucial to the overall success of your Castella cake. In a clean, grease-free bowl, beat 5 egg whites on high speed. Add 6g of lemon juice as soon as you start beating—this helps stabilize the meringue. When big bubbles form, add the first third of the 70g sugar. As the bubbles become finer, add the second third of the sugar. When you see fine lines forming as you beat the mixture, add the remaining sugar. Continue beating until you achieve a firm/medium peak meringue. The peaks should hold their shape but still have a slight curl at the tip. This texture ensures your cake rises beautifully without cracking.
Folding the Meringue:
- Take 1/3 of the meringue and gently fold it into your yolk batter using a spatula. This first mix helps lighten the yolk mixture and makes folding the rest easier. Then pour the yolk batter back into the bowl with the remaining meringue. Fold gently but thoroughly, turning the bowl as you mix. The goal is to combine without deflating the meringue. Important: Don’t rush this step. Overmixing will deflate the batter and under-mixing will leave streaks.
Pour and Prep the Pan:
- Line the bottom of your 6-inch square pan with parchment paper and lightly grease the sides. Pour the final batter gently into the pan. Give it a light tap to release large air bubbles trapped inside.
Bake Using Water Bath Method:
- Place your cake pan into a larger tray filled with hot water—this is called the bain-marie or water bath method. It allows the cake to bake gently and evenly, preventing cracks on top. Bake at 150°C (302°F) for 1 hour 15 minutes to 1 hour 30 minutes. Avoid opening the oven during the first hour as it may cause the cake to collapse. You’ll know the cake is ready when the top is a rich golden brown and a skewer inserted in the center comes out clean.
Demould and Cool:
- Once out of the oven, remove the cake from the pan immediately to prevent condensation from forming and making the bottom soggy. Let it cool on a wire rack. For the cleanest edges, you can trim the sides once the cake is fully cooled.