
 By Esha Kamran
Chocolate mochi combines the deep, comforting flavour of chocolate with the uniquely soft and chewy texture of traditional mochi. Each bite has a slightly crisp exterior, a tender centre and a satisfying stretch that makes this dessert difficult to resist.
Unlike classic filled mochi, this recipe is baked in a pan and cut into individual squares. It is inspired by butter mochi, a popular Hawaiian dessert that uses glutinous rice flour to create its signature bouncy texture. The addition of cocoa powder and chocolate chips turns it into a rich treat that tastes somewhere between a brownie and soft mochi.
This chocolate mochi recipe is also surprisingly easy to prepare. There is no complicated shaping, steaming or filling involved. Simply whisk the ingredients together, pour the batter into a pan and bake until the edges are set. Whether you are making dessert for a gathering, preparing a sweet snack or trying glutinous rice flour for the first time, this recipe offers a delicious and approachable place to begin.
Why You’ll Love This Chocolate Mochi
This homemade chocolate mochi is:
- Wonderfully soft, chewy and slightly stretchy
- Rich in chocolate flavour without being overly sweet
- Easy to prepare in one mixing bowl
- Naturally gluten-free when certified ingredients are used
- Delicious at room temperature or slightly warm
- Suitable for parties, lunchboxes and casual desserts
- Easy to customize with different toppings and flavours
- Made without complicated mochi-shaping techniques
The contrast between the crisp edges and fudgy centre makes these chocolate mochi squares especially enjoyable. Edge pieces are slightly firmer, while centre pieces remain particularly soft and chewy.
What Is Chocolate Mochi?
Mochi is traditionally made from Japanese glutinous rice that is steamed and pounded until it develops a smooth, elastic consistency. Convenient modern recipes often use glutinous rice flour, which makes it possible to create the characteristic chewy texture without pounding cooked rice.
This baked chocolate mochi is slightly different from traditional Japanese mochi. It is influenced by Hawaiian butter mochi, which commonly includes glutinous rice flour, coconut milk, butter, eggs and sugar.
Adding cocoa powder gives the dessert a rich chocolate flavour, while melted butter and coconut milk keep the centre moist. The finished chocolate mochi can be sliced into squares and served without any filling or additional decoration.
Important Ingredient Note

Glutinous rice flour is essential for this recipe. It may also be labelled sweet rice flour or mochiko flour. Despite its name, glutinous rice flour does not contain gluten. The word “glutinous” refers to the sticky texture the flour creates when cooked. Do not replace it with regular rice flour, all-purpose flour or cornstarch. These ingredients behave differently and will not produce the soft, stretchy texture expected from chocolate mochi.
Recipe Overview
- Preparation time: 15 minutes
- Baking time: 50–60 minutes
- Cooling time: 45 minutes
- Total time: Approximately 1 hour 55 minutes
- Servings: 16 squares
- Pan size: 8-inch or 20-centimetre square pan
- Difficulty: Easy
Ingredients
- 2 cups or approximately 300 grams glutinous rice flour
- ½ cup or 45 grams unsweetened cocoa powder
- 1 cup or 200 grams granulated sugar
- 1 teaspoon baking powder
- ¼ teaspoon fine salt
- 2 large eggs, at room temperature
- 1 can or approximately 13.5 fluid ounces coconut milk
- ¾ cup or 180 millilitres whole milk
- ½ cup or 113 grams unsalted butter, melted and slightly cooled
- 2 teaspoons vanilla extract
- ½ cup or 85 grams semisweet chocolate chips
- 1 teaspoon instant espresso powder, optional
- Flaky sea salt for finishing, optional
How to Make Chocolate Mochi
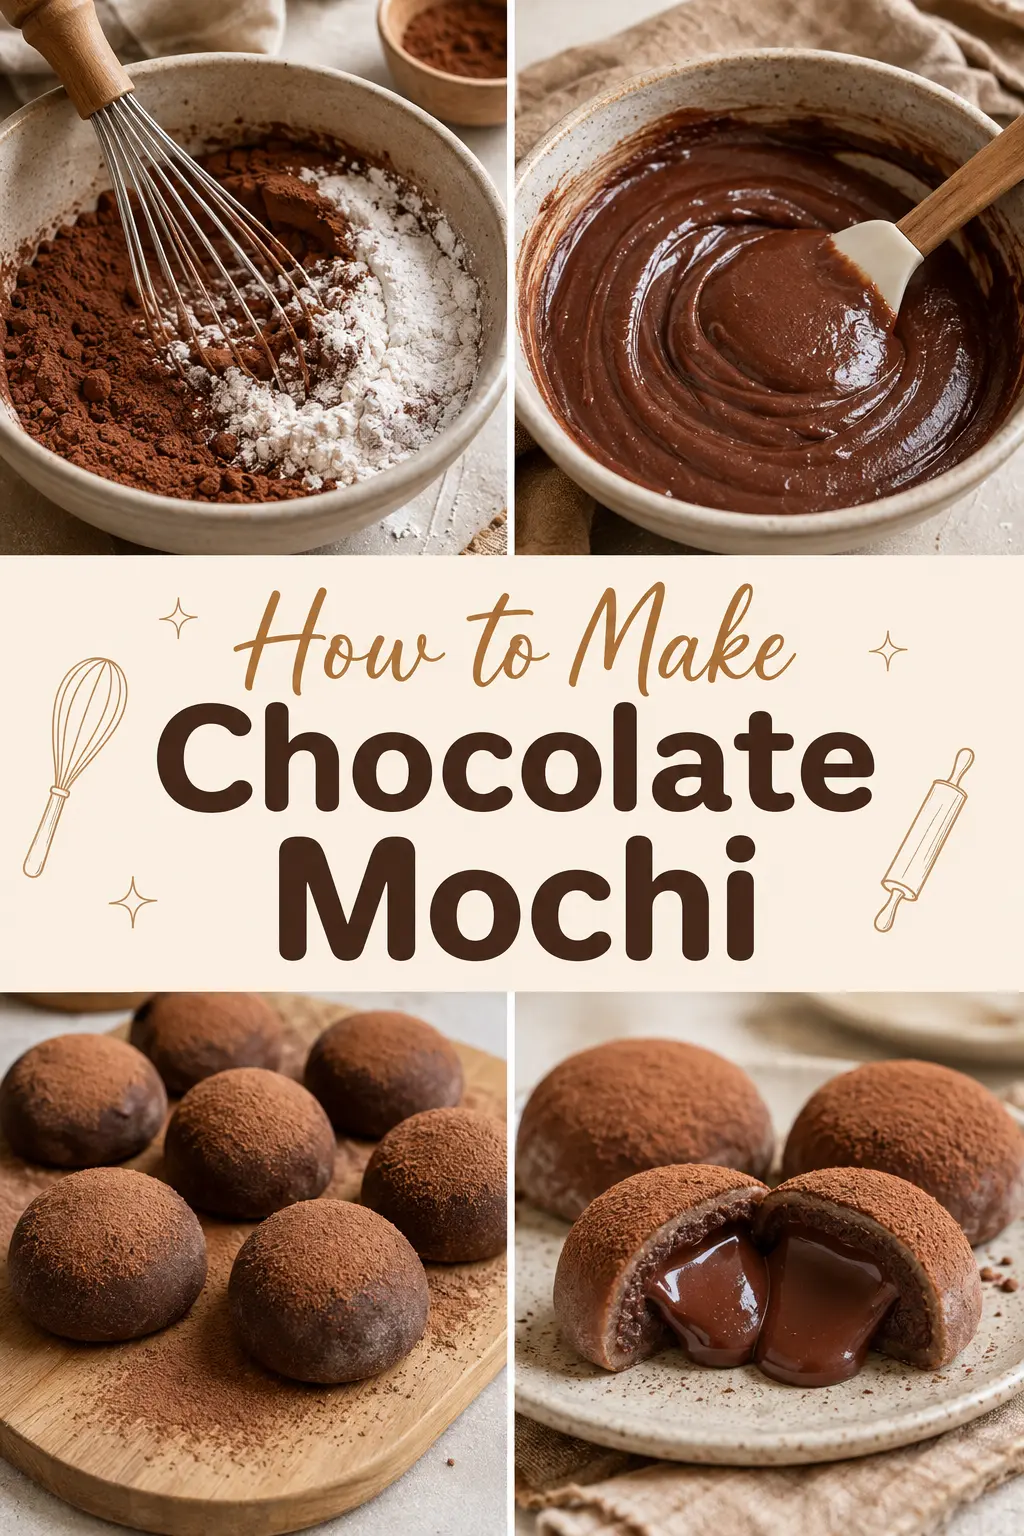
Step 1: Prepare the Baking Pan
Preheat the oven to 350°F or 175°C. Lightly grease an 8-inch square baking pan. Line it with parchment paper, leaving a small amount hanging over two opposite sides. This creates handles that make it easier to lift the baked mochi from the pan. Grease the parchment lightly to prevent sticking. A metal pan will produce slightly firmer edges, while a glass pan may require a few additional minutes of baking.
Step 2: Combine the Dry Ingredients
Add the glutinous rice flour, cocoa powder, granulated sugar, baking powder and salt to a large mixing bowl. If you are using espresso powder, add it at this stage. Whisk thoroughly, breaking apart any visible lumps of cocoa powder. Proper mixing helps distribute the cocoa and baking powder evenly throughout the batter. Espresso powder is optional, but a small amount can intensify the chocolate flavour without making the mochi taste strongly of coffee.
Step 3: Whisk the Wet Ingredients
In a separate medium bowl, whisk the eggs until evenly combined. Add the coconut milk, whole milk, melted butter and vanilla extract. Continue whisking until the mixture looks smooth. Make sure the melted butter is slightly cooled before adding it so that it does not begin to cook the eggs. For the richest texture, use full-fat canned coconut milk. Shake or stir the coconut milk before measuring because the creamy portion may separate from the liquid inside the can.
Step 4: Prepare the Batter
Gradually pour the wet mixture into the bowl of dry ingredients, whisking continuously. Continue mixing until the batter is smooth and no dry pockets remain. The batter will be thinner than brownie batter and may resemble a thick chocolate custard. This consistency is normal. Glutinous rice flour absorbs moisture and becomes chewy as it bakes. If small cocoa lumps remain, pour the batter through a fine-mesh sieve before transferring it to the baking pan.
Step 5: Add the Chocolate Chips
Fold approximately two-thirds of the chocolate chips into the batter. Reserve the remaining chips for the top. Chocolate chips create small pockets of melted chocolate throughout the mochi. Avoid adding too many because excessive chocolate can make the squares oily and interfere with their chewy structure. Pour the batter into the prepared pan. Tap the pan gently against the counter a few times to release large air bubbles. Sprinkle the reserved chocolate chips evenly over the surface.
Step 6: Bake the Chocolate Mochi
Bake for 50–60 minutes. The edges should look set and slightly puffed, and the centre should no longer appear liquid. A toothpick inserted into the centre may come out with a few moist crumbs or melted chocolate, but it should not be coated in raw batter. The mochi may rise while baking and settle slightly as it cools. Avoid overbaking. The dessert will continue to firm as it cools, and excessive baking can make the edges tough.
Step 7: Cool and Slice
Place the pan on a wire rack and allow the chocolate mochi to cool for at least 45 minutes. Cooling is important because the interior remains extremely soft immediately after baking. Use the parchment handles to lift the mochi out of the pan. Transfer it to a cutting board and slice it into 16 squares with a sharp knife. For cleaner cuts, lightly grease the knife with neutral oil and wipe it between slices. Finish the squares with a small amount of flaky sea salt, if desired.
7 Irresistible Secrets for Perfect Chocolate Mochi

1. Use the Correct Rice Flour
Glutinous rice flour gives mochi its stretchy, pleasantly sticky consistency. Regular rice flour will create a dry or crumbly result and should not be used as a substitute.
2. Choose Full-Fat Coconut Milk
Full-fat coconut milk provides moisture, richness and a subtle coconut flavour. Light coconut milk contains more water and may produce a less satisfying texture.
3. Measure the Cocoa Carefully
Too much cocoa powder can make chocolate mochi dry or bitter. Spoon cocoa into the measuring cup and level it rather than packing it firmly.
4. Mix Until Smooth
Cocoa powder and glutinous rice flour can form small lumps. Whisk the batter thoroughly or strain it before baking for the smoothest texture.
5. Avoid Overbaking
The centre should be set but still moist. Remember that chocolate mochi becomes firmer as it cools, so do not wait for it to become completely firm inside the oven.
6. Allow Enough Cooling Time
Freshly baked mochi is difficult to slice and may appear underdone. Let it cool before removing it from the pan so that the chewy structure has time to develop.
7. Grease the Knife Before Cutting
Chocolate mochi is naturally sticky. A thin coating of neutral oil on the knife helps create neat squares without pulling or tearing the dessert.
Easy Chocolate Mochi Variations
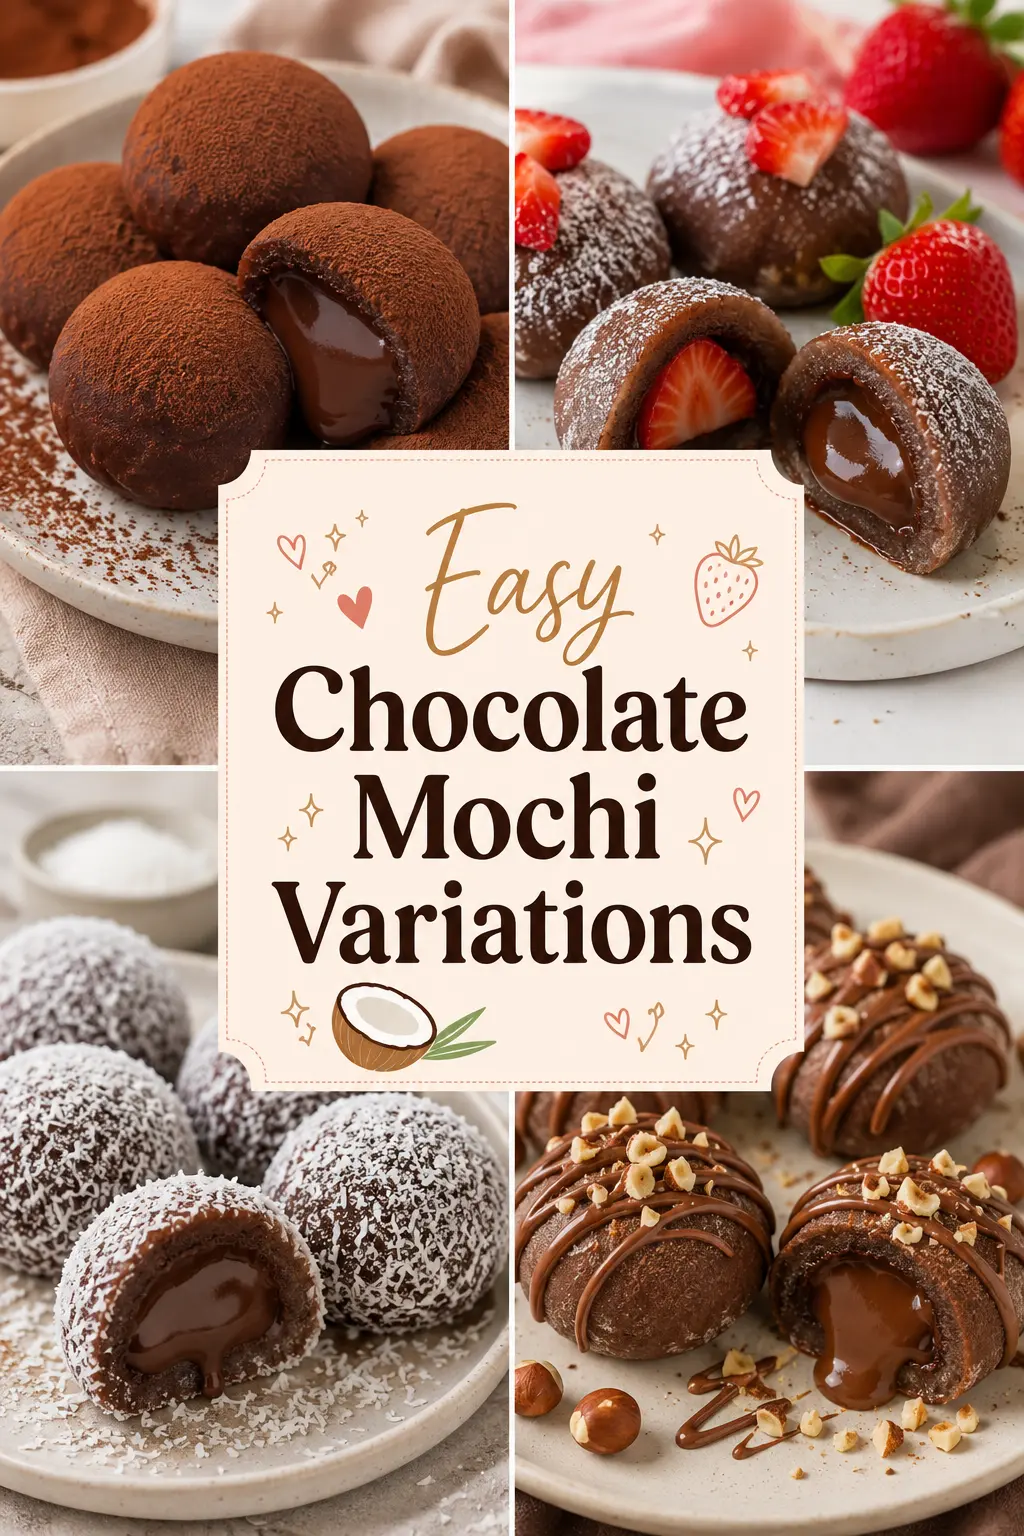
Dark Chocolate Mochi
Use dark cocoa powder and dark chocolate chips for a deeper, more intense flavour. You may add one or two additional tablespoons of sugar if your cocoa is particularly bitter.
Peanut Butter Chocolate Mochi
Drop small spoonfuls of creamy peanut butter over the batter and swirl them gently with a knife before baking. Avoid overmixing if you want the swirl to remain visible.
Chocolate Coconut Mochi
Sprinkle toasted shredded coconut over the finished squares. Coconut complements both the cocoa and the coconut milk in the batter.
Chocolate Hazelnut Mochi
Swirl approximately ⅓ cup of chocolate-hazelnut spread into the top of the batter. Finish the cooled mochi with chopped toasted hazelnuts.
Mint Chocolate Mochi
Replace half of the vanilla extract with a small amount of peppermint extract. Peppermint is powerful, so begin with only ¼ teaspoon.
White Chocolate Mochi
Fold white chocolate chips into the batter instead of semisweet chocolate chips. Their sweet, creamy flavour creates a pleasant contrast with the cocoa.
Serving Suggestions

Serve chocolate mochi at room temperature for the best balance of softness and chewiness. It can be enjoyed plain or paired with:
- Fresh strawberries or raspberries
- Vanilla or coconut ice cream
- Lightly sweetened whipped cream
- A drizzle of warm chocolate sauce
- Toasted coconut flakes
- Chopped hazelnuts or almonds
- Fresh banana slices
- A light dusting of cocoa powder
- Hot coffee, cold milk or green tea
For a more elegant dessert, place one warm chocolate mochi square on a plate with a small scoop of vanilla ice cream. The cold, creamy ice cream contrasts beautifully with the warm and chewy mochi.
How to Store Chocolate Mochi
Place cooled chocolate mochi in an airtight container and store it at room temperature for up to two days. Keeping it at room temperature generally preserves its soft texture better than refrigeration. For longer storage, refrigerate the squares for up to five days. Chilled mochi will become firmer, so warm an individual piece in the microwave for approximately 10–15 seconds before serving.
Chocolate mochi can also be frozen. Wrap the individual squares and place them in a freezer-safe container for up to two months. Thaw them at room temperature or microwave briefly until soft. Do not overheat the mochi because the centre can become extremely hot.
Common Mistakes to Avoid
Using ordinary rice flour is the most common mistake. Regular rice flour does not have the starch structure needed for the characteristic mochi texture. Another issue is slicing the dessert too soon. Even when properly baked, hot mochi will be very soft and sticky. Cooling gives it enough stability to hold its shape. Finally, avoid reducing the liquid ingredients significantly. Glutinous rice flour needs plenty of moisture to become soft and chewy. Altering the ratio can make the finished dessert dense or tough.
Frequently Asked Questions
Is chocolate mochi gluten-free?
Glutinous rice flour is naturally gluten-free. However, check the packaging of the cocoa powder, baking powder, chocolate chips and other ingredients if you are preparing the recipe for someone with coeliac disease or a serious gluten sensitivity.
Can I replace glutinous rice flour with regular rice flour?
No. Regular rice flour will not create the stretchy and chewy texture of mochi. Look for flour labelled glutinous rice flour, sweet rice flour or mochiko.
Why is my chocolate mochi oily?
A slightly glossy surface is normal because the recipe contains butter and coconut milk. Excessive oiliness can result from adding too many chocolate chips, using poorly mixed coconut milk or measuring the butter incorrectly.
How do I know when chocolate mochi is fully baked?
The edges should be set and slightly puffed, while the centre should no longer jiggle like liquid. A toothpick may have moist crumbs, but it should not contain raw batter.
Can I make chocolate mochi without coconut milk?
Yes. Replace the coconut milk with the same amount of whole milk or another creamy dairy-free milk. However, the finished mochi may be slightly less rich and will not have the subtle coconut flavour.
Final Thoughts
This chocolate mochi recipe transforms a short list of familiar ingredients into a dessert with an unforgettable texture. It is rich like a chocolate brownie, soft like a custard and delightfully chewy like classic mochi.
The simple pour-and-bake method makes it suitable for beginners, while the chocolate chips and optional toppings offer plenty of room for customization. Serve the squares plain for an everyday treat or dress them up with ice cream and berries for a memorable dessert.
Once you experience the combination of crisp edges, a fudgy centre and that signature mochi chew, these chocolate mochi squares may quickly become one of your favourite homemade chocolate treats.
Check our Instagram and Facebook pages for more recipes.
