
 By Jawariya
There’s something wonderfully nostalgic about fairy cupcakes. Smaller and more delicate than typical American-style cupcakes, these little cakes feature a soft vanilla sponge, a simple sweet icing, and colorful sprinkles. They’re the kind of bake that feels at home at a children’s birthday party, afternoon tea, bake sale, or family gathering.
If you’re looking for recipe for fairy cupcakes that are easy enough for beginners but still produce light, tender little cakes, this recipe is a great place to start. The secret isn’t piling them high with heavy frosting; it’s getting the sponge light, moist, and just sweet enough so the decoration complements rather than overwhelms the cake. Traditionally, fairy cakes are smaller than cupcakes and are usually finished with a simple icing and sprinkles rather than a tall buttercream swirl.
Why You’ll Love This Recipe for Fairy Cupcakes
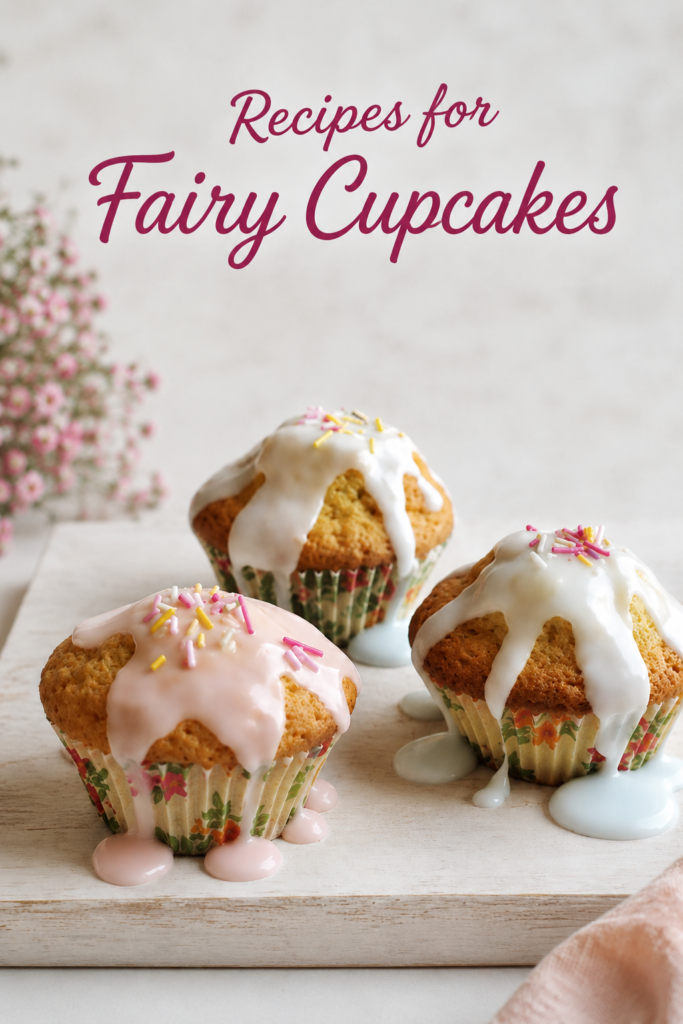
These aren’t oversized cupcakes disguised as fairy cakes. They’re intentionally small, delicate, and easy to decorate, making them particularly appealing for parties and afternoon treats. The vanilla sponge has a soft, tender crumb, while the simple icing adds sweetness without making the cakes feel heavy.
- Light and fluffy vanilla sponge
- Soft, tender crumb
- Quick and simple batter
- Perfect for children’s parties and afternoon tea
- Simple icing instead of heavy frosting
- Easy to customize with different colors and sprinkles
- Ready in around 30–40 minutes
The combination of vanilla sponge, simple icing, and colorful decorations makes fairy cakes especially versatile. You can keep them classic with white icing and sprinkles, or customize the colors and decorations for birthdays, holidays, school events, or themed parties.
What Exactly Are Fairy Cupcakes?
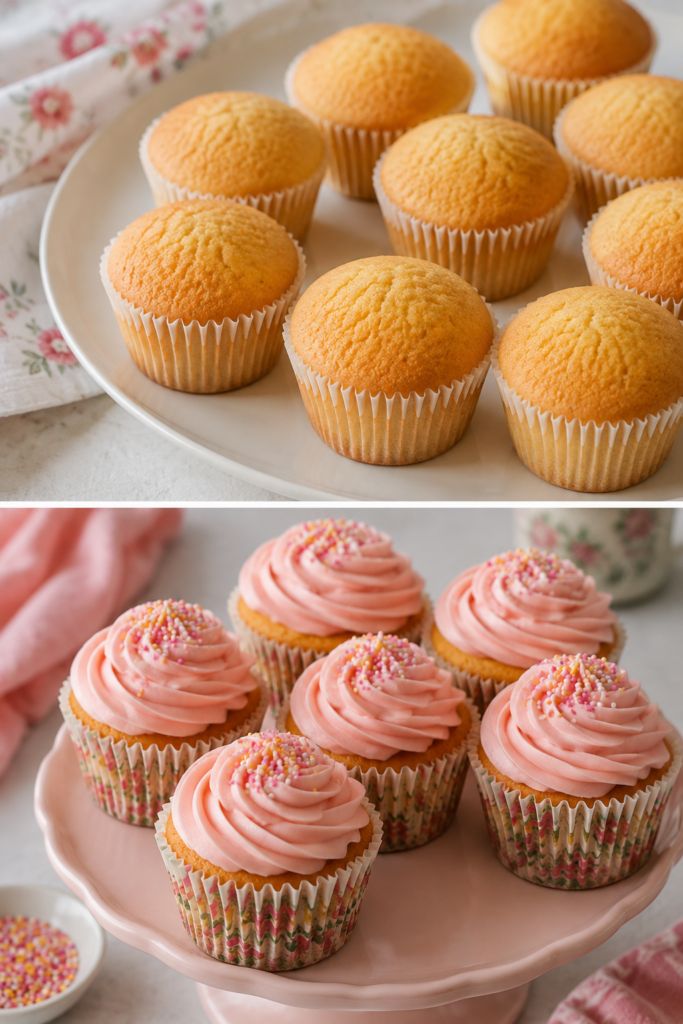
Fairy cupcakes, more commonly called fairy cakes in Britain, are small individual sponge cakes made with a simple butter, sugar, egg, and flour mixture. They’re closely related to cupcakes, but there are some traditional differences in their size and decoration.
Fairy cakes are generally smaller and lighter, while cupcakes tend to be larger and are often finished with a generous swirl of buttercream. Fairy cakes are commonly topped with a thin layer of simple icing and colorful sprinkles, giving them their characteristic delicate appearance.
If you already have a standard cupcake or muffin tin, you can still make these cakes without any problem. Simply use smaller paper cases where possible and avoid filling them too generously, as fairy cakes are meant to be small and light.
Ingredients for Fairy Cupcakes
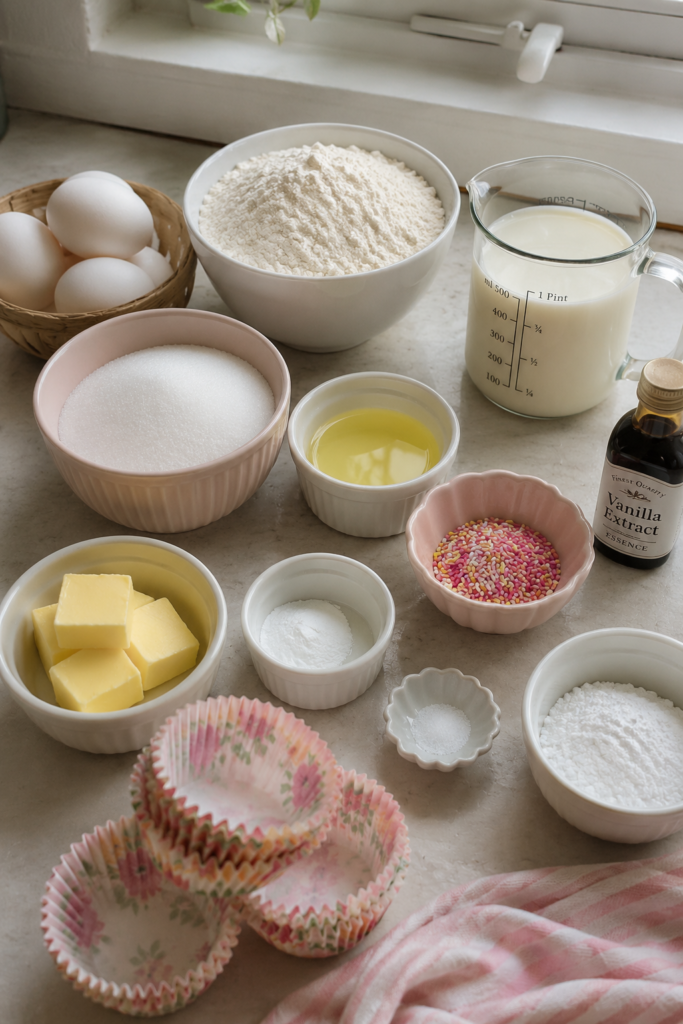
For the cakes
- 125 g unsalted butter, softened
- 125 g caster sugar
- 2 large eggs, room temperature
- 125 g self-raising flour
- 1 teaspoon vanilla extract
- 2 tablespoons milk
- Pinch of salt
For the simple icing
- 200 g icing sugar
- 2–3 tablespoons water or milk
- A few drops of vanilla extract, optional
- Food coloring, optional
- Sprinkles, sugar stars, or other decorations
This ingredient combination keeps the recipe simple while producing the light, tender texture that makes fairy cakes so appealing. The basic sponge relies on the familiar combination of butter, sugar, eggs, and flour, while a little milk helps loosen the batter and keeps the finished cakes soft.
Why These Ingredients Work
Butter
Butter provides the rich, familiar flavor you expect from a traditional fairy cake while also helping create the cake’s tender texture. Use butter that is soft enough to beat easily with the sugar, but avoid using melted butter because it won’t incorporate air in the same way during the creaming stage.
Caster Sugar
Caster sugar works particularly well in a light sponge because its fine crystals blend easily with softened butter. This helps create a smooth mixture while contributing sweetness and a delicate texture.
Eggs
Eggs provide structure to the sponge and help the cakes rise during baking. Using room-temperature eggs also makes it easier to create a smooth, well-combined batter, particularly when they’re added gradually to the creamed butter and sugar.
Self-Raising Flour
Self-raising flour keeps the recipe straightforward because it already contains a raising agent. If you only have plain or all-purpose flour, you can use it with baking powder instead. For this recipe, approximately 1½ teaspoons of baking powder with 125 g plain flour is a suitable alternative.
Milk
A small amount of milk loosens the batter and helps create a softer, more delicate crumb. You don’t need much because the batter should remain thick enough to hold its shape in the paper cases.
Vanilla
Vanilla gives these simple cakes their classic flavor. Because the recipe doesn’t contain many strong ingredients, the quality of the vanilla can make a noticeable difference, so use a good vanilla extract if you have one.
How to Make Fairy Cupcakes
1. Prepare the Oven and Cases
Preheat your oven to 180°C / 350°F / Gas Mark 4, or 160°C fan. Line a 12-hole fairy cake or bun tin with small paper cases. If you’re using a standard muffin tin, you can use regular cupcake cases, although the finished cakes will be somewhat larger.
2. Cream the Butter and Sugar
Place the softened butter and caster sugar in a large mixing bowl and beat for about 2–3 minutes, or until the mixture becomes noticeably paler and fluffy. This step is more important than it might seem because beating the butter and sugar incorporates tiny pockets of air into the mixture, helping contribute to a lighter sponge. Avoid rushing this stage, particularly if you want delicate fairy cakes rather than dense little sponges.
3. Add the Eggs Gradually
Beat the eggs in a separate bowl, then gradually add them to the butter mixture, beating well after each addition. Adding the eggs slowly helps keep the mixture smooth and prevents it from becoming overly curdled. If the mixture does look slightly split, don’t worry; adding a small spoonful of the flour can help bring it back together.
4. Add the Flour
Sift the self-raising flour and salt into the bowl, then gently fold them through the mixture. Add the vanilla and milk and continue folding until you have a smooth, soft batter. Avoid excessive mixing at this stage because once flour has been incorporated, overworking the batter can result in a heavier texture.
The finished batter should be soft enough to fall easily from a spoon but not so loose that it spreads like liquid.
5. Fill the Cases
Divide the batter evenly between the paper cases, filling each one to roughly two-thirds full. This gives the cakes enough room to rise without overflowing. A small ice cream scoop or cookie scoop can make this step easier and helps ensure that all the cakes are approximately the same size.
6. Bake
Bake the fairy cakes for approximately 12–16 minutes, depending on the size of your cases and your oven. They’re ready when the tops are lightly golden, the cakes spring back when gently pressed, and a toothpick inserted into the center comes out clean.
Because fairy cakes are relatively small, they can go from perfectly baked to dry quite quickly. Start checking them toward the lower end of the baking time rather than waiting for them to become deeply golden.
7. Cool Completely
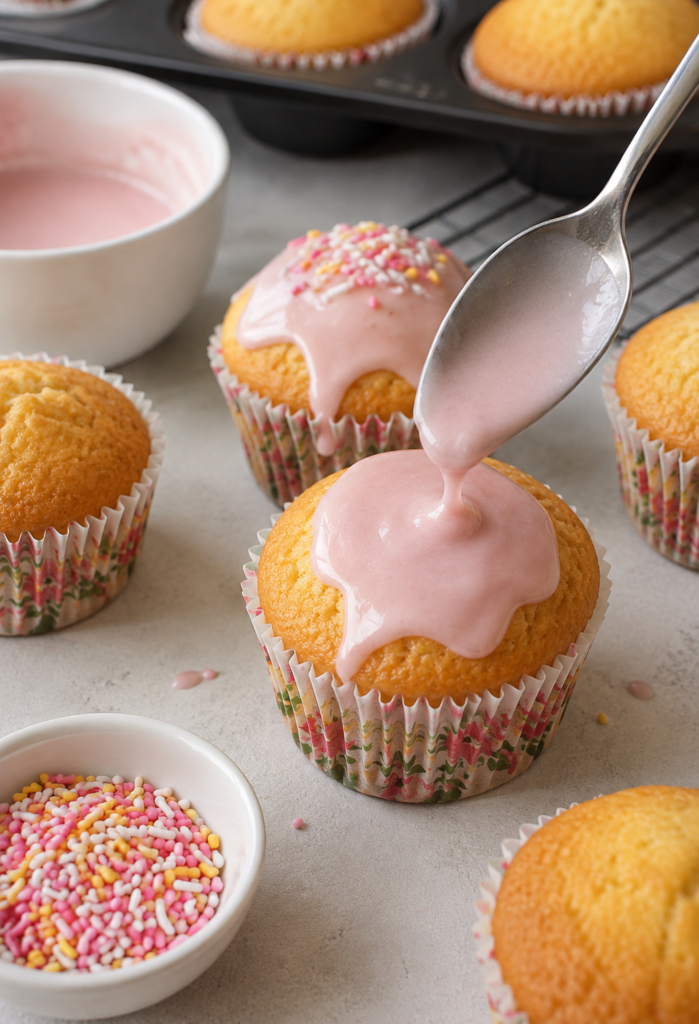
Allow the cakes to sit in the tin for about 5 minutes before transferring them to a wire rack. Let them cool completely before adding the icing. Decorating warm cakes can cause the icing to melt, become runny, and slide away from the surface.
How to Make Simple Fairy Cake Icing
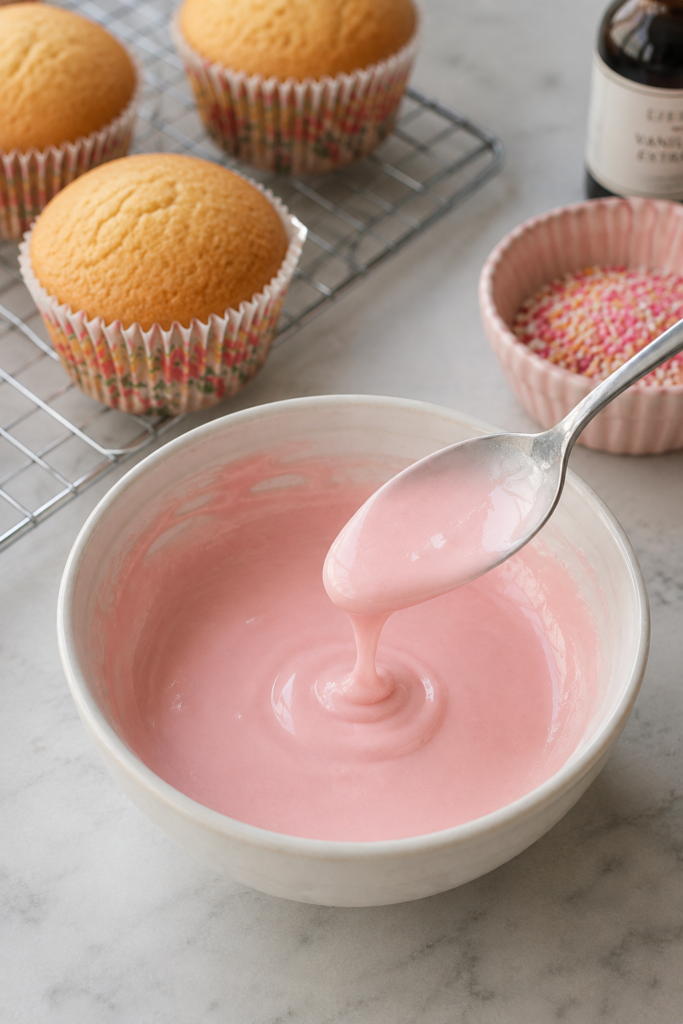
The beauty of fairy cakes is that they don’t need a large amount of buttercream to make them feel special. A simple icing creates the traditional delicate finish while allowing the vanilla sponge to remain the main attraction.
Place the icing sugar in a bowl and gradually add the water or milk, stirring as you go. Add only enough liquid to create a thick but spreadable icing. You want it thicker than a runny glaze but soft enough to spread easily over the tops of the cakes.
For colorful fairy cakes, divide the icing between several small bowls and add a tiny amount of food coloring to each. Pastel shades such as pink, baby blue, lavender, pale yellow, and mint green work particularly well. Spoon a little icing onto each cooled cake and immediately add the sprinkles while the icing is still wet so they stick properly.
The Secret to Really Light Fairy Cakes
Although fairy cakes are small, the technique used to make them still has a major effect on their texture. A few simple details can be the difference between a light, tender sponge and a dense or dry cake.
Start with soft butter. Cold butter won’t cream properly with the sugar, while melted butter won’t provide the same aeration. Let the butter soften naturally until it is easy to press with your finger but still holds its shape.
Don’t rush the creaming stage. Beating the butter and sugar until pale and fluffy helps incorporate air into the mixture, which contributes to the light texture of the finished cakes.
Add the eggs gradually. Adding all of the eggs at once can cause the mixture to split, making it more difficult to achieve an evenly textured batter.
Fold the flour gently. Once the flour is incorporated, avoid unnecessary mixing. Excessive mixing can develop gluten and make the cakes less tender.
Don’t overbake. This is one of the easiest ways to turn soft fairy cakes into dry ones. Because they’re small, they need relatively little time in the oven.
Cool before decorating. Let the cakes cool completely before adding icing so that the topping stays where you put it.
Fairy Cakes vs Cupcakes
| Fairy Cakes | Cupcakes |
|---|---|
| Usually smaller | Usually larger |
| Light sponge | Often richer cake |
| Simple icing | Often buttercream |
| Sprinkles are common | Elaborate decoration is common |
| Delicate, bite-sized feel | More substantial dessert |
| Traditional British-style bake | More associated with American-style cupcakes |
There isn’t a rigid universal rule separating fairy cakes from cupcakes, and the terms can overlap depending on the recipe and region. However, size, texture, and decoration are the most useful practical distinctions. Fairy cakes tend to be smaller and lighter, with a simple icing finish, while cupcakes are often larger and designed to carry a more substantial frosting.
Fun Ways to Decorate Fairy Cupcakes
Once you’ve mastered the basic vanilla fairy cake, you can use the same recipe as a blank canvas for all kinds of decorations. The small size makes them particularly easy to customize without requiring advanced cake-decorating skills.
Rainbow Fairy Cakes
Use several pastel-colored icings and finish each cake with rainbow sprinkles. You can either give every cake a different color or combine several colors on each cake for a playful effect.
Butterfly Fairy Cakes
For a classic butterfly-style decoration, carefully cut a small circle from the top of each cooled cake and slice that piece in half. Add a little buttercream or jam to the center, then position the two pieces on top like butterfly wings.
Birthday Fairy Cakes
Brightly colored icing, edible stars, and colorful sprinkles turn these simple cakes into an easy birthday-party treat. You can also match the icing colors to the party theme.
Princess Fairy Cakes
For a more delicate look, try pale pink or lavender icing with pearl sprinkles and small edible decorations. Keeping the colors soft gives the cakes a charming, elegant appearance.
Christmas Fairy Cakes
Top the cakes with white icing and red and green sprinkles, or use tiny edible Christmas decorations for a festive version.
Halloween Fairy Cakes
Orange, purple, or black icing paired with Halloween-themed sprinkles can transform the same basic vanilla sponge into a fun seasonal dessert.
Can You Make Fairy Cupcakes Without Self-Raising Flour?
Yes. If you don’t have self-raising flour, you can use 125 g plain or all-purpose flour with approximately 1½ teaspoons of baking powder and a pinch of salt. Sift the flour, baking powder, and salt together before adding them to the batter so the raising agent is distributed evenly throughout the mixture.
The important thing is not simply adding more baking powder to make the cakes rise higher. Too much raising agent can cause the cakes to expand rapidly in the oven and then collapse as they cool.
Can You Make Fairy Cakes Ahead of Time?
Absolutely. Once baked, allow the fairy cakes to cool completely before storing them in an airtight container at room temperature. For the best texture and appearance, it’s generally preferable to decorate them closer to serving time.
You can also freeze the un-iced sponge cakes. Once they have cooled completely, place them in an airtight freezer-safe container or wrap them well before freezing. Allow them to thaw completely at room temperature before decorating.
Why Did My Fairy Cakes Sink?
If your fairy cakes rise nicely in the oven but collapse as they cool, there are several possible causes. One common reason is that the cakes weren’t baked long enough for the center to fully set. An underbaked sponge can look perfect on the outside while remaining too delicate inside to support itself.
Opening the oven door too early can also cause a sudden drop in temperature, which may interfere with the cake’s structure. Another possibility is using too much liquid, which can make the batter too loose, or overmixing after adding the flour, which can affect the final texture.
Using too much baking powder can also cause problems. More raising agent doesn’t automatically produce a lighter cake; excessive amounts can cause rapid expansion followed by collapse.
Why Are My Fairy Cakes Dry?
If your fairy cakes are dry, overbaking is one of the first things to check. Because these cakes are small, they require considerably less baking time than a large sponge cake. Start checking them toward the lower end of the recommended baking time and remove them as soon as they’re lightly golden, springy to the touch, and fully cooked in the center.
Measuring the flour accurately is also important. Too much flour can produce a dry, heavy sponge, so weighing the ingredients rather than measuring flour by volume is the most reliable approach.
Can I Use Buttercream Instead of Simple Icing?
Definitely. A simple icing is a traditional choice and keeps the fairy cakes delicate, but vanilla buttercream works beautifully if you want a richer and more celebratory finish.
For a simple vanilla buttercream, beat 100 g softened butter with 200 g icing sugar, 1 teaspoon vanilla, and 1–2 tablespoons milk until pale and fluffy. Pipe a small swirl onto each completely cooled cake and finish with sprinkles.
If you’re aiming for a traditional fairy cake rather than a modern cupcake, keep the buttercream layer relatively small. The goal is to complement the sponge rather than bury it under frosting.
My Favorite Way to Serve Fairy Cupcakes
For an afternoon tea or children’s party, arrange the fairy cakes on a large serving plate and use a mixture of pastel icing colors so the display looks varied and inviting. You don’t need to make every cake identical; in fact, a combination of pink, blue, yellow, purple, and white often looks more appealing than a completely uniform arrangement.
Because fairy cakes are small, they’re also ideal for serving alongside tea, coffee, fresh fruit, or other small desserts. Guests can easily choose more than one, making them particularly useful when you’re preparing treats for a group.
Recipe Card
Easy Vanilla Fairy Cupcakes
Prep: 15 minutes | Bake: 12–16 minutes | Total: About 30–35 minutes | Makes: 12 small fairy cakes
Ingredients
- 125 g softened unsalted butter
- 125 g caster sugar
- 2 large eggs
- 125 g self-raising flour
- 1 teaspoon vanilla extract
- 2 tablespoons milk
- Pinch of salt
For the Icing
- 200 g icing sugar
- 2–3 tablespoons water or milk
- Food coloring, optional
- Sprinkles, optional
Instructions
- Preheat the oven to 180°C / 350°F / Gas Mark 4, or 160°C fan, and line a 12-hole fairy cake or bun tin with paper cases.
- Beat the softened butter and caster sugar until pale and fluffy, about 2–3 minutes.
- Beat the eggs separately and gradually add them to the butter mixture, beating well after each addition.
- Sift in the self-raising flour and salt, then gently fold them through the mixture.
- Add the vanilla and milk and fold until you have a smooth, soft batter.
- Divide the batter evenly between the paper cases, filling each about two-thirds full.
- Bake for 12–16 minutes, or until the cakes are lightly golden and spring back when gently pressed.
- Leave the cakes in the tin for about 5 minutes, then transfer them to a wire rack and cool completely.
- Mix the icing sugar with enough water or milk to create a thick, spreadable icing. Add food coloring if desired.
- Spread the icing over the cooled fairy cakes and decorate with sprinkles while the icing is still wet.
Final Thoughts
If you’re searching for recipe for fairy cupcakes, you don’t need a complicated recipe, elaborate frosting, or specialist equipment to make something that feels special. The best fairy cakes are all about getting the fundamentals right: a light vanilla sponge, delicate crumb, simple sweet icing, and playful decoration.
Take your time when creaming the butter and sugar, add the eggs gradually, fold the flour gently, and keep a close eye on the cakes while they’re baking. Most importantly, don’t overbake them. Once you’ve mastered this basic vanilla version, you can easily adapt it for birthdays, bake sales, afternoon tea, holidays, and almost any occasion where a tray of charming little cakes is welcome.
Check our Instagram and Facebook pages for more recipes.
